
Print and Final Adjustments


When I set out on creating this board game I had a goal in mind. I wanted to be able to bring this game into the Conference Associates (CA) breakroom at GDC 2023. I was planning to attend the event as I had in the past as a CA and remembered that some members bring in board games to help pass the time when off shift and though that it would be a good place to show my work.
I made sure to begin the printing process very early and worked with my printing company to ensure I was creating my designs on template and that everything was measured to fit the needs of all game components.
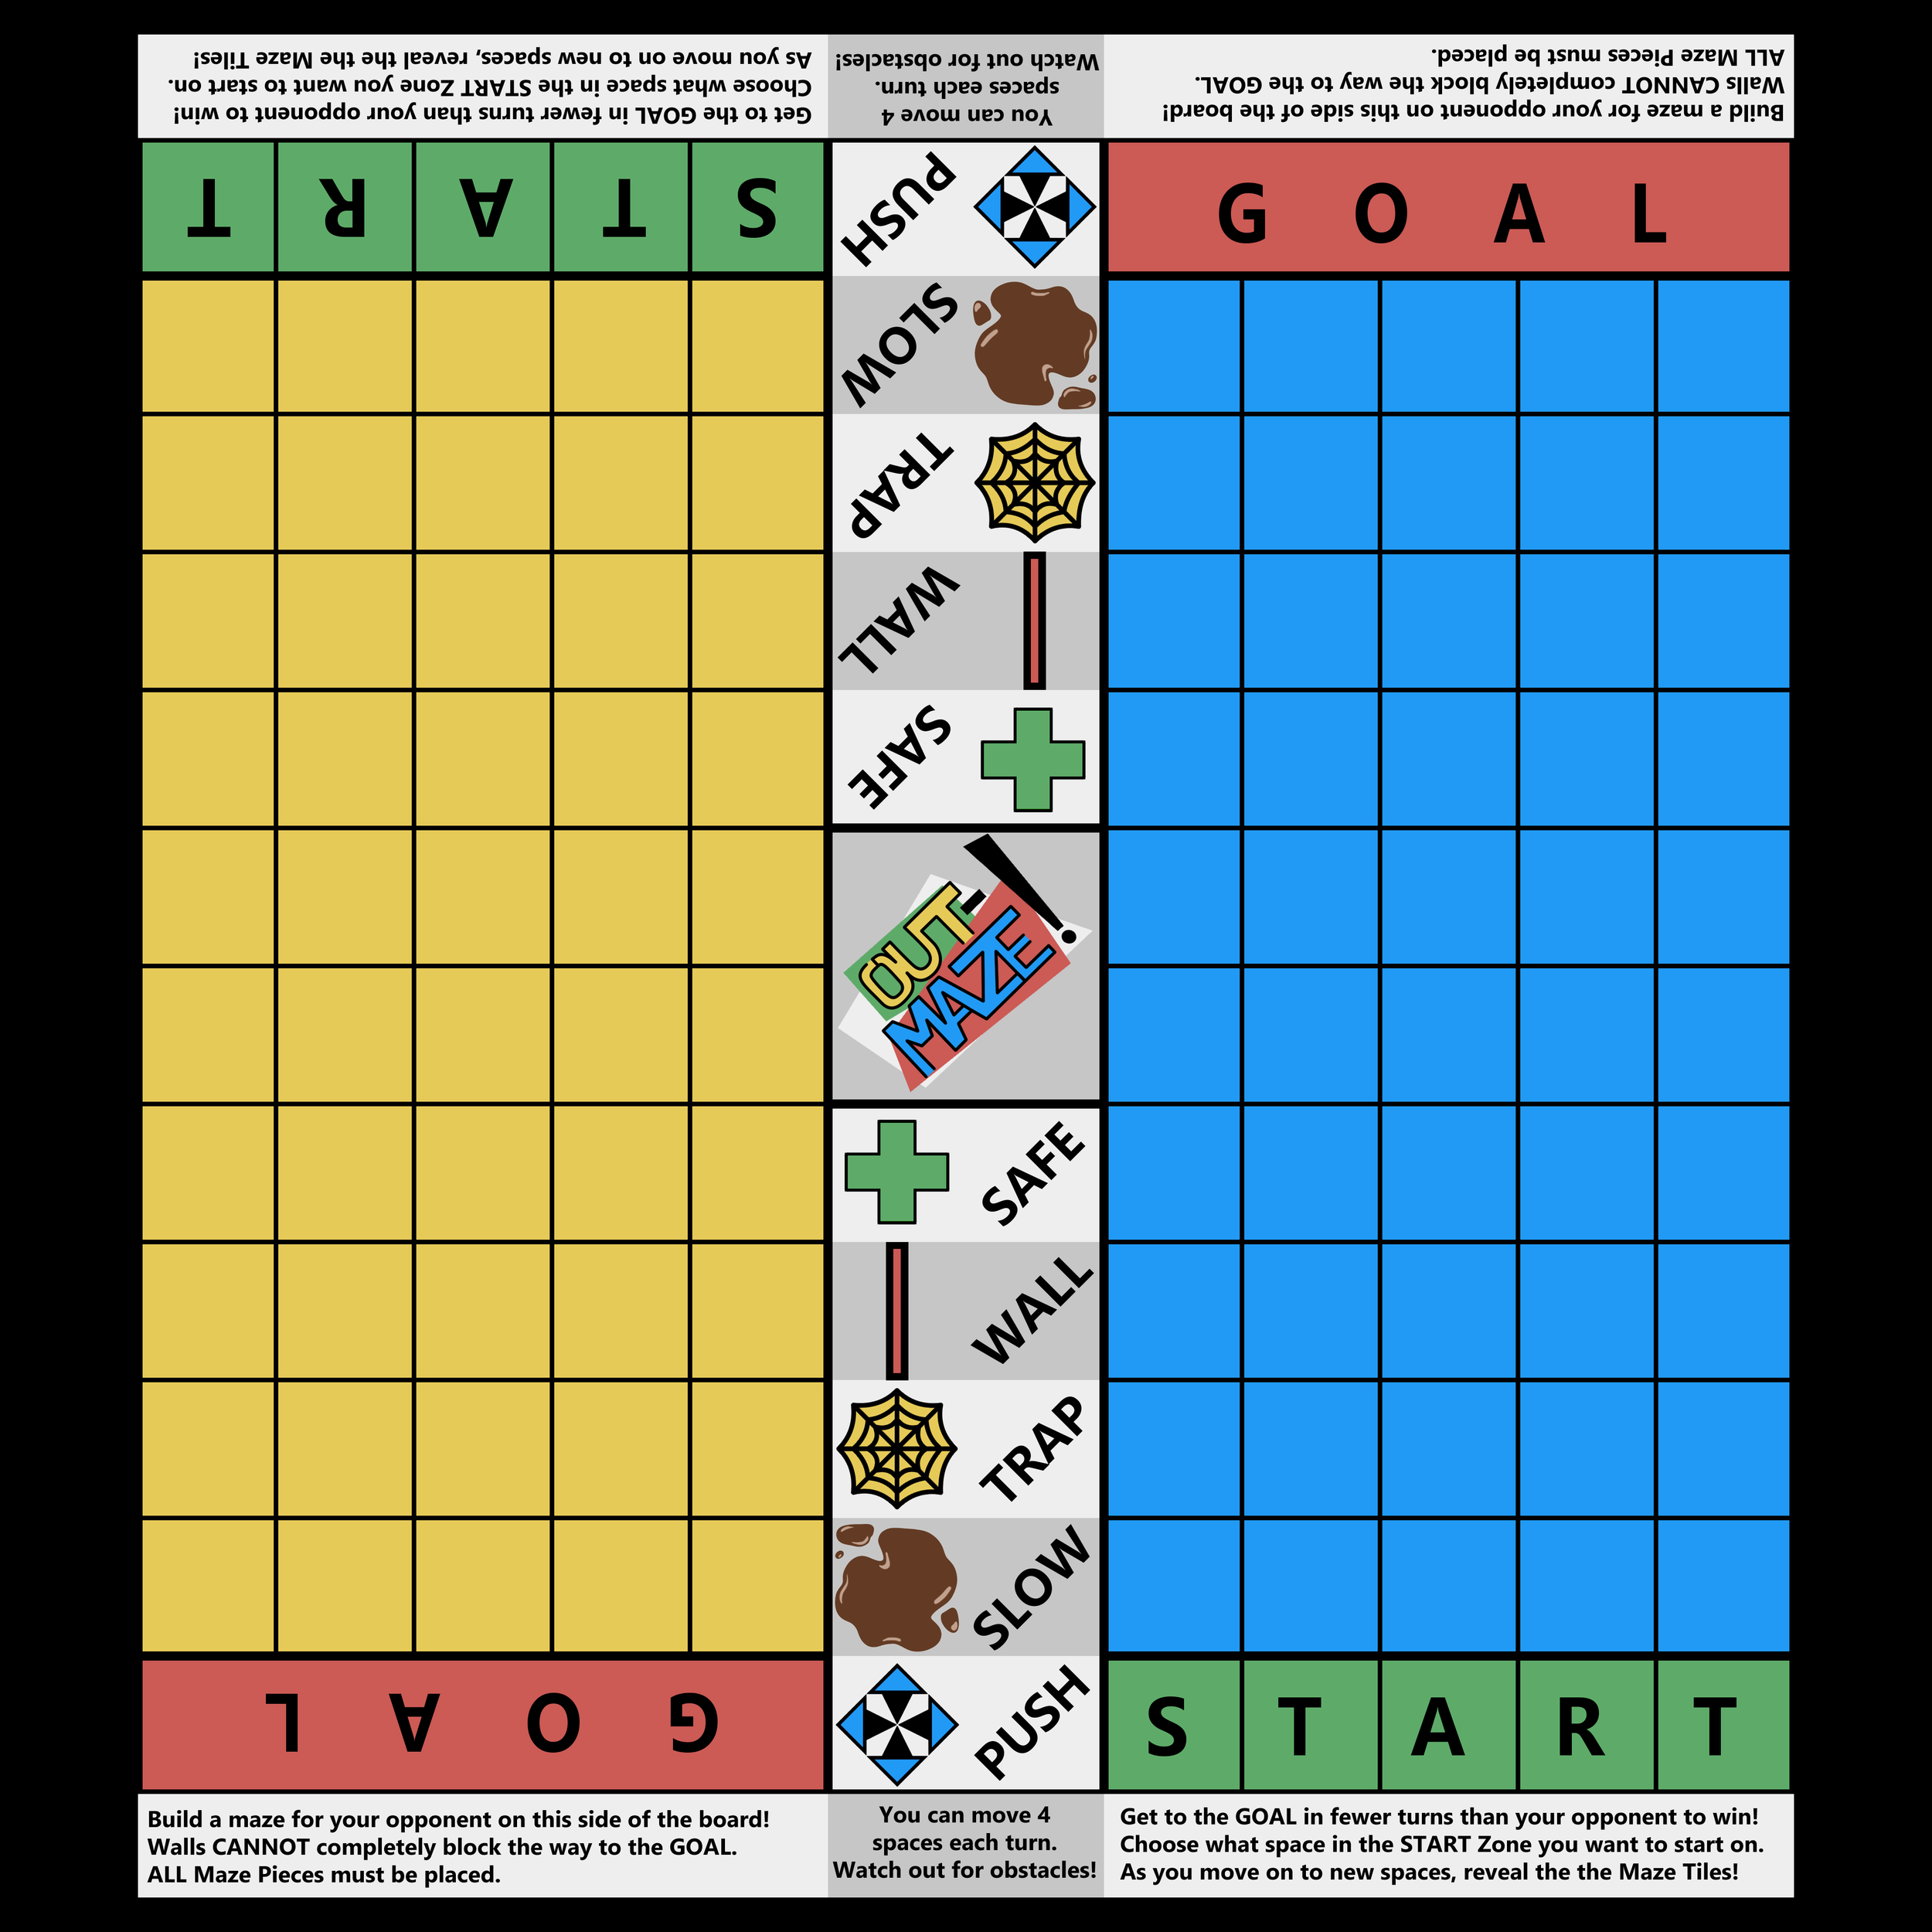
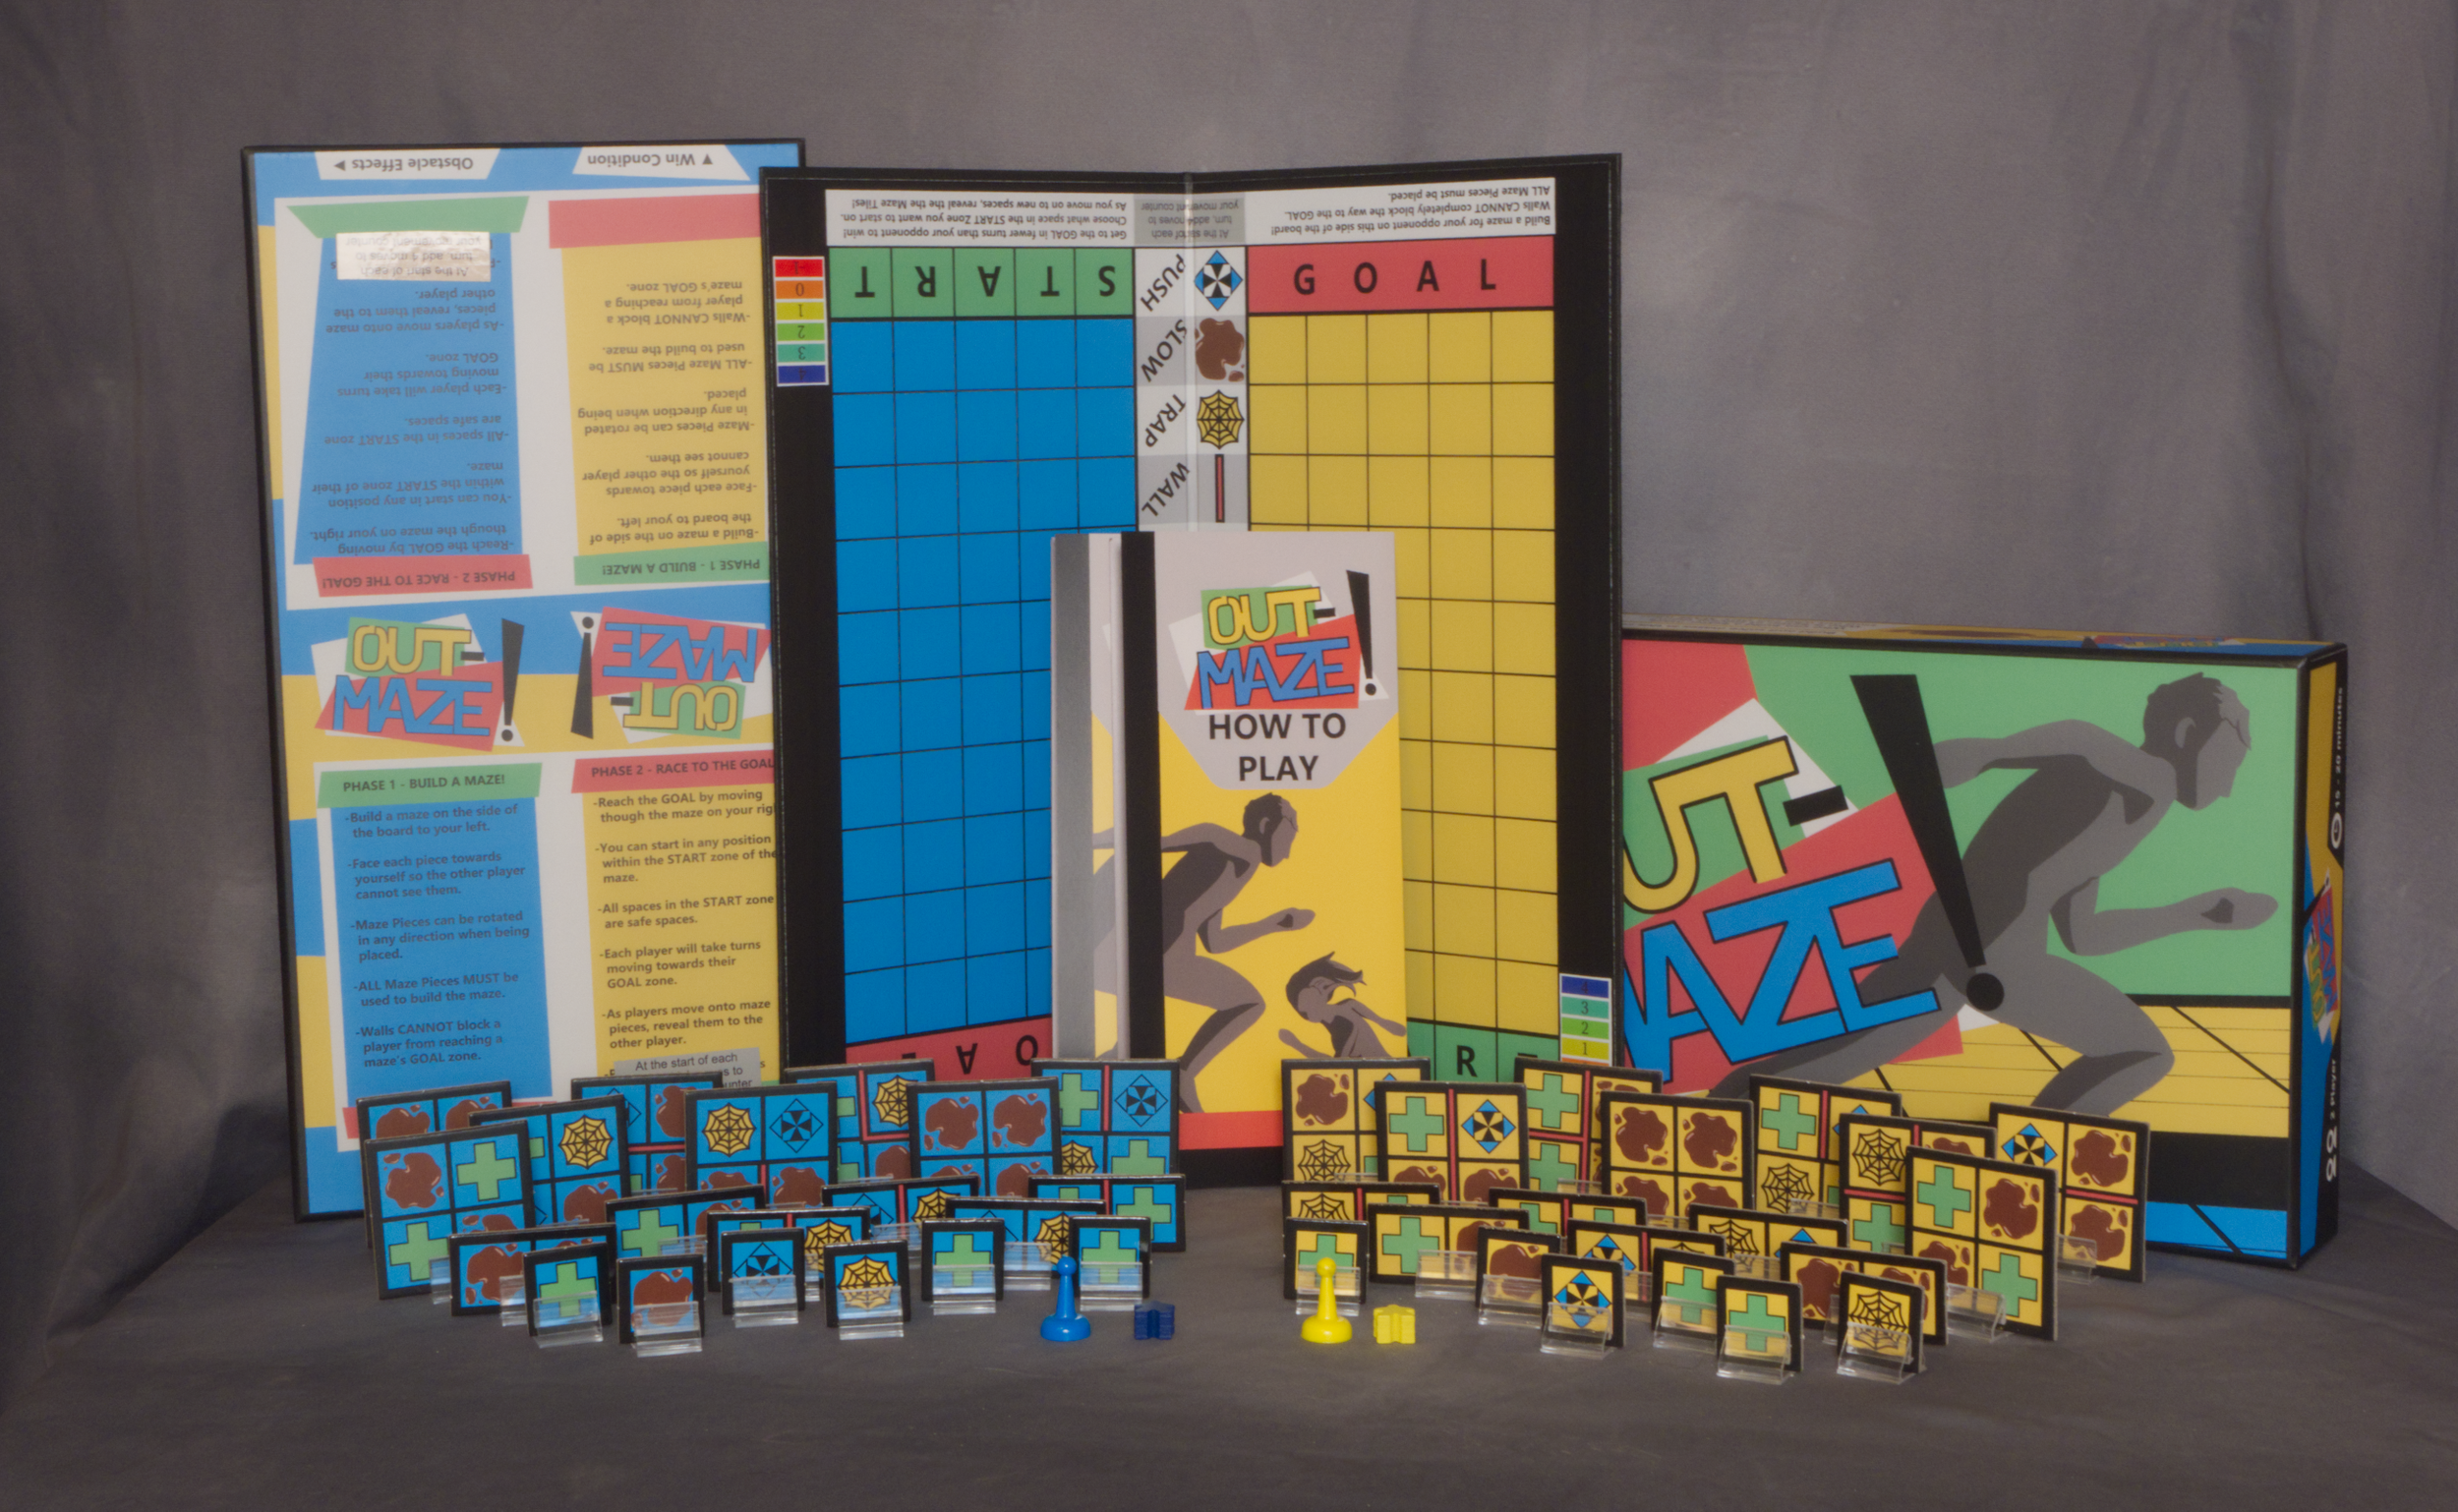
I began with the board itself and made sure that the colors and layout of the board were simple and easy to read. At either end of the board are basic summaries of what is done on either side of the board, the player’s left being for where they build their maze, and the right being for where they play the maze made by their opponent. Between these is a reminder of the moves each player has on each turn that is adjusted after the printing process which I will cover later on this page. The central section of the board where each side is separated provides a legend of the various obstacles for reference.

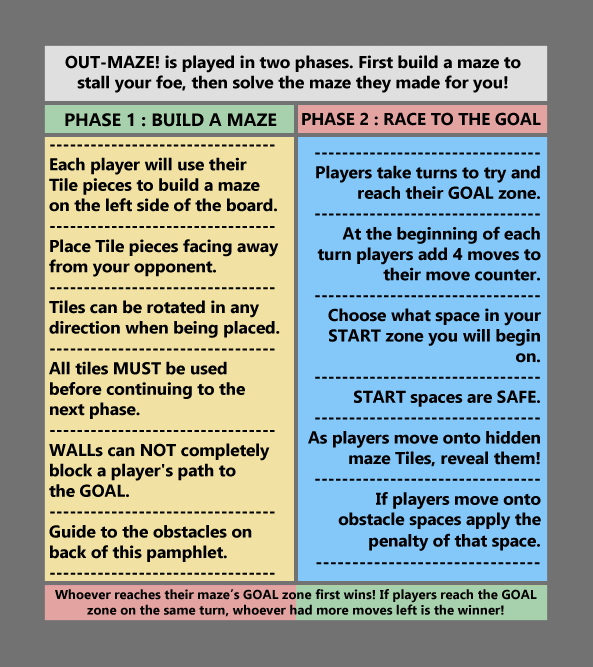
The box was the next step. I made a quick logo based on the colors used on the board and added a tagline on one of the sides. I struggles for a bit with the bottom half of the box however and was unsure of what I could fill the space with. After some time though I decided to use it as an additional place to record the rules of the game. I laid out colored block in the same rough orientation as the board is and wrote the rules for the first phase of play on the corresponding side of the board and did the same for the second. I then made a duplicate of the board and rotated it so both players could have the box base next to the board while playing and refer to it for the rules when needed. The sides or the bottom half of the box cover the effects of the obstacles as well as the game’s win condition.

It was at this time I began to plan for the next phase of this project. I intend to recreate OUT-MAZE! digitally and on several different engines to practice coding in different languages, a process that is still in progress. At this time I had begun re-writing the various rules of the game in C++ when I realized that I had a problem with the effects of the SLOW spaces.
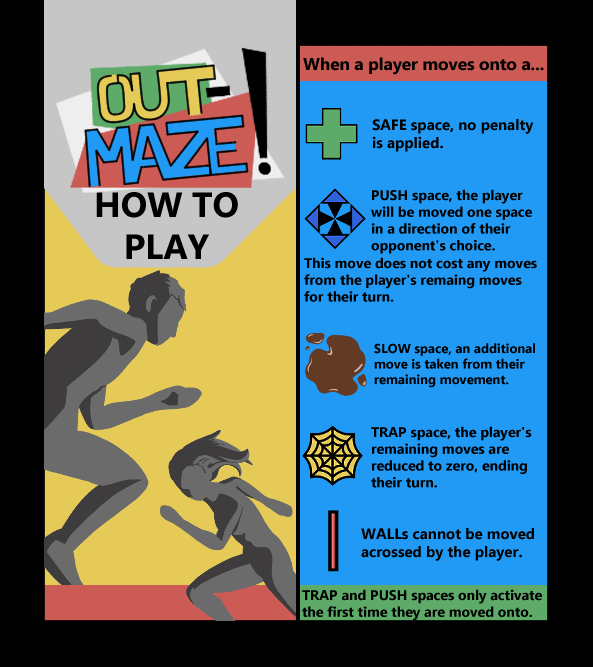
At the time of playtest the effect of the SLOW space was that it took away an extra move of the player when moved onto. This however did not work if a player had landed on one on their last move of their turn, so when playing we would take the additional move away as the player moved off of that space the following turn.
Although this effectively maintains the overall effect of the space it creates an exception to the rule of how obstacle effects are applied, as this would be the only time the effect of any obstacle is applied at any time other than the moment it is landed upon. I wanted to keep the rulebook as simple as possible and explaining this exception was something I felt over complicated the gameplay so I instead chose to alter other aspects to maintain a consistent simplicity in the rules.
Luckily nothing in regards to the rules on the SLOW space itself needed to be altered, instead a slight change to the movement system was enough to allow the SLOW space to take effect in the same manner as all other obstacles that were already in place. In accommodating this simplicity one changes was made to the movement system.
The allocation of moves at the start of the turn changed, instead of a player having 4 moves at the start of every turn, they would now gain 4 moves at the start of each turn. Once their moves drop to 0 they can no longer move, but obstacles can still drop this number lower, specifically the SLOW space. If a player lands on a SLOW space on their last move the effect is applied regardless and drops them down to -1 moves, meaning that at the start of their next turn they will add 4 moves back to their pool and only have 3. This maintains the same result of the workaround used during the game’s playtest phase while requiring less explanation overall.
At this time however my boards, boxes, and tiles had already been printed. So to implement these changes I went to a printer and made some custom stickers. One set of stickers would be used to replace the old rule for movement allocation on both the board and the boxes while another set would add a counter to each side of the board to allow players to keep track of their remaining moves in case it is needed.
As it happens I had not yet sent out my rules sheet design for print, so I was able to get them made with the correct rules on movement. The rules sheet folds in half and mimics the board in the background, with the rules for each phase on the side of the board they are relevant to, similar to the bottom portion of the box.
I noticed that the pawns I had ordered for the game were extremely light and felt unsatisfying to move around the board, so I attempted to increase their weight to improve the feel. I gathered some small bearings of tungsten and placed them in the base of the pawn, unfortunately only one of these could fit in each pawn. I then mixed some 1:1 epoxy together and filled the remaining hollow space. After resting the pawn now weigh slightly more and have a solid, flat base. As far as I can tell the weight increase is minimal as is the improvement on the feel they have. In the future I will attempt to source better pawn or, if time allows make them myself.
I continue to develop this game digitally and once completed will provide links to where it is available for download